

Do you search for an auto-turn or rotation goose egg incubator? You don’t have enough time to stay in the hatching area?
Just think, if you have an automatic incubator for poultry eggs, automatically the breeding system will be performed with an adjusted temperature for humidity adjustment.
Here, I have told you the solution with some guidelines. I want to help you choose the right incubator for quail eggs, parrot eggs, chicken eggs and other birds for you.
You don’t need to collect an extra hygrometer to monitor the humidity level of the area of that egg machine. If you feel like adjusting more than one sensor in that hatching machine, then you can do it.
There is good news for you that you don’t need extra candlers to check the improvement of fertilized eggs. This hatching machine has a system to observe this situation.
So if you want to find this type of hatch machine, then you should read the information below. Here I have also tried to tell you some important factors that you need.
So keep reading.
At first, I have faced some problems like manual egg rotation and manual setting up a hygrometer for manual humidity control for solving these issues.
To solve these issues, I thought that I must find an automatic hatchery machine. But at that time I was not sure about the availability of that type of chick production device.
If you have no time to search for the most reliable hatching device, then you may try this recommended machine that is given below. You can use this warm incubator for parrot eggs, chicken eggs, goose eggs, duck eggs, and more!
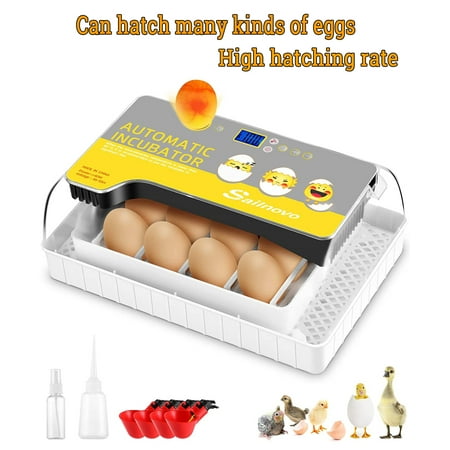
Best Pick: Fully Automatic Egg Incubator, Hatchery Machine
In Spite of having little limitation, it still stands top position among other economical incubators. It has an automatic humidity (humidifier unit) that controls the humidity level.
It has an advanced airflow system for keeping the fixed temperature on all sides. So this type of hatchery machine is called a forced-air incubator. It has an easy cleaning system in the inside area.
It is also easily portable too. For checking the growing process of the egg, it has a built-in egg candler that you can use easily. For adding water, you don’t need to open an incubator. Because a water pot is included outside of that hatching machine. There is also a special facility for that chick production machine.
It has an alarm for protecting the egg from unexpected temperature and humidity levels. I think this facility will shorten your time for monitoring all incubation processes. You can use this for almost all types of eggs for hatching properly.
Pros
- Has automatic egg turners (turning system)
- Enable led electronic display for temperature setting
- Most selling incubator
Cons
- It is used only for 9-12 eggs at a time
- Plastic material
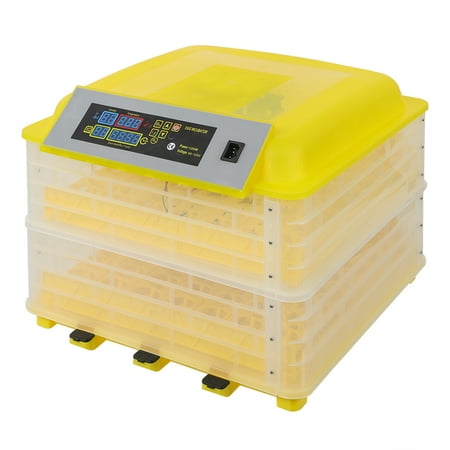
Runner Up and Alternative Incubator
If you don’t collect your chosen incubator, then you don’t need to be upset. There is another alternative incubator that you can try without any confusion.
Automatic Egg Turner Hatching Incubator
It is also an automatic hatching machine too. There are multiple facilities in it. For example, it has a fixed temperature setting, displaying humidity percentage, egg candler for easy checking of egg development, an auto-stop egg turner system, and an external water pot for replenishing water when necessary.
Besides, you don’t need a large size to place this hatching machine. You can also easily move it to your required place.
Pros
- Don’t need huge time to monitor the hatching process
- Automatic control system
Cons
- Only available hatching reset days
Factors You Need to Know Before Buying an Incubator
1. Time Spending
Time is a crucial factor in poultry hatching. The manual incubator needs manual egg rotation by hand, additional egg candler or led candler, humidity set up time.
You especially need to rotate all the eggs every one or two hours. So if you want to be free from this extra time, then you may choose a mini advance automatic incubator.
2. Size and Capacity
The size or weight of a hatching machine is also important. It depends on the capacity of breeding poultry eggs that you need.
If you want to start with small and medium breeding egg capacity like 9-10 eggs, then this type of mini digital egg Incubator is perfect for you.
If you are thinking of starting with 25- 30 eggs. Then you need almost 3 incubators. You can place it in a small area too.
3. Cleaning System
Any hatchery machine should have the facility for quick cleaning by washing water. So you should try to choose any mechanical incubator that has an easy cleaning system.
If there are additional flat egg hatching trays in it then you should clean them. If you ignore the cleaning procedure of any hatchery machine, then the egg may be damaged in that condition. So you should keep concentration to that point.
4. Availability of Airflow
Airflow is needed in the hatchery machine. To keep the temperature the same automatically in all the sections of the hatching device, there definitely needs airflow. This is the reason why a good hatching device has an automatic airflow system.
In the still air incubator, there is no automatic air system for flow. A forced-air incubator is better than a still air incubator. So I have also selected a forced air type of hatching device.
5. Budget
Budget is also a matter according to the capacity of the hatchery machine. At first, you should plan about the breeding egg, then choose a perfect one according to your choice.
My suggestion is that at first start with a small size of a hatching device if you are a starter. After gathering knowledge, then you can proceed with a big one. So start with a hatching device that matches your budget.
6. Incubation Time
Knowing the breeding time is also important if you really want to start a poultry business. The incubation time may vary according to the birds that you choose.
You should follow the Incubator Instruction sheet when you collect hatching devices. So please check the breeding time from that menu before purchasing. Normally there is a standard incubation time that is included in that menu list.
How does the Incubator Work?
To hatch eggs with actual humidity, without a mother bird, you need a device called an incubator. (source)
It includes a motor, fan and temperature display, and brooder lamps. This fan flows the heat in the total side. The wall of the hatchery machine is made of insulator material.
This is the reason why the temperature of all sections will grow at a specific temperature and remain the same. Through the digital display, you can easily understand what the actual temperature is at that place.
Eggs are placed on the bottom surface of the hatchery machine. Sometimes you have to rotate them. Because All sides of eggshells need equal temperature properly.
In automatic incubators with adjustable egg trays, the system automatically rotates eggs. There is an egg-turner in that hatching incubator.
In a manual incubator, egg notation is done manually. In the past, farmers usually turned thousands of eggs per one or two hours by using their hands.
Normally they maintain the turning angle of the egg. So the turnover angle of eggs is 43 degrees to 45 degrees.
After getting the required temperature the fertile egg turns to embryo then chick. If there is any problem during the incubation period, then it causes embryo death.
By doing this farmers have also spent lots of time. But today there is an automatic hatchery machine with an automatic turner. So here, by using it, lots of time can be saved spontaneously.
To keep the humidity level fixed, water must be added or removed for controlling the water level. To understand the digital humidity level, a hydrometer is included in that hatching device.
We can understand the percentage of humidity by focusing on the display of the hygrometer. You can also use an egg candler tester for checking the hatchable eggs of the hatching device.
How to Use this Incubator
Do you know what an incubator is? It is a man-made machine that has the capability to hatch the egg without a mother bird.
Do you know about egg hatchability?
Explanation: Actually it is the percentage of fertile eggs that are ready to hatch. It is also important for some proper settings. They are temperature, humidity, etc.
If you are really interested in hatching poultry eggs, then you should know the instructions below carefully.
If you are a beginner, then start reading these steps with awareness.
Step One: Collect Incubator
There are different types of hatching devices in the marketplace. Choose the right one according to your plan.
My suggestion is that you should collect an automatic type of hatchery machine so that you can easily control the total breeding system.
Step Two: Clean the Collected Incubator
Clean visible dust with a soft cloth inside the total surface of the incubator. You can use bleach mixing water for cleaning that dust.
Remember, use hand gloves, when you use bleach water. This cleaning is important because any disease can be transformed inside the cover of the eggshell.
Step Three: Accurate Location of the Incubator
You should keep this hatchery machine in a fixed or constant temperature area. Because any fluctuation of temperature may damage the egg. Don’t place it in an airflow area like a window, door, etc.
Step Four: Connect the Electricity
Connect the cord of the hatchery machine to the electricity safely. Make sure that your children can’t unplug it anyhow.
After connecting the electricity, check that everything is working fine. Especially check that the setting of the button of temperature and humidity is working.
According to the directions, add some water to this hatch tool. This water is needed to grow a humidity environment into it. Humidity is created by the evaporation of water. Don’t worry. This system is included in this hatching device.
Step Five: Set the Temperature and Humidity of the Incubator
Set the temperature between 37°C to 38.9°C according to bird type. Humidity will be 55% to 80%. Now check the temperature and humidity for one hour.
If the setting of everything is correct, then proceed to the next step. You can keep extra reliable thermometers and sensors in an automatic hatching device for checking the actual temperature and humidity.
Step Six: Collect Fertile Eggs
Don’t use the egg that is collected from the supermarket. You can find fertile eggs from poultry farmers, poultry hatcheries, etc.
If you don’t do this, then contact your local agriculture office. I think you will get help collecting this type of egg for hatching.
After collecting eggs, store them from 4°C to 21°C before placing them in the hatching device. Remember, your hand should be clean when you collect the egg.
You can’t touch any egg without hand protection. Many diseases may pass from birds to humans and humans to eggs. So keep alert when you touch any egg.
Step Seven: Preparation for Incubation of Bird Eggs
Warm these eggs to room temperature for some time. Mark all these eggs for identification.
This marking will be needed during egg rotation in the incubator. For example, you can use a cross(x) sign for identifying the rotation of the egg.
Step Eight: Place Eggs in the Incubator
After marking all eggs, then you can set them in the hatching device. Make sure that all marking sides of eggs are shown from one side. After placing all eggs, again check the temperature and humidity for a while.
Step Nine: Record Time
Start recording the time and make a chart, when you put all eggs in the incubator. According to the bird species, it may vary incubating time. Normally it may need 18 days to 30 days incubation.
You should also mark the starting date in a calendar. After 18 days, the weight of the egg is decreased during incubation and this is called egg weight loss.
Step Ten: Egg Candling
You need to check the proper growth of all eggs by the candling process after 7 days to 10 days. It is done by applying lighting to the egg.
After applying the light on one side of an egg, you can see the development of that egg by looking from the other side of that egg.
If you see the veins and blood circulation inside the egg, then that egg is growing well. On the other hand, if you see nothing inside of any eggs, then remove that egg from the hatching device. Normally you will see the appearance of a candling system in an automatic hatchery device.
N.B: After passing the normal incubation periods, many farmers use warm water to determine if the eggs are still hatching or not.
Step Eleven: Monitor Eggs Rotation
In the automatic incubator, there is a setting for egg rotation. Just monitor whether these eggs are rotating or not.
You can easily understand the rotation of eggs by following the cross mark sign of all eggs. During checking these eggs, you can also monitor spoiled and good eggs.
If any egg spoils, then instantly remove it from the hatching device. Last three days, you should stop the rotation of all eggs. This time is the hatching level of eggs and you should increase the humidity level.
Now, you should stop the rotation of eggs in that hatchery machine, there is a system for stopping the rotation of eggs.
Step Twelve: Change Humidity Level for Last Three Days
This is the main part of the hatching process. For different types of birds, you need different humidity. Here Humidity will be 65% to 85%.
Talk to any consultancy hatchery farm or any experienced person for the exact humidity level for the exact bird. You should keep an alert for replenishing water to maintain the humidity level.
Here the suggested hatchery device has an external water pot. So you don’t need to open the lid of the hatching device for replenishing water. Now you may have a question about this device that ..
How much water will I supply to that incubator?
Well, this is also a good question about supplying daily water to any hatchery device. Now I am simply telling you about this. Just continue reading.
According to the humidity level, you need to supply or stop water in the hatching device. For keeping the standard humidity level, you need to understand the time of adding water and removing water.
To decrease humidity, just remove water from the water pot. On the other hand, to increase the humidity level, just add water to that water pot.
According to the weather conditions, different areas may vary. So to control the humidity level of that incubator, you need to supply daily water or remove water from the incubator. I think you have got my point about this supply issue.
Step Thirteen: Don’t Remove Chick Instantly
You should wait for the proper time for collecting healthy chicks from the hatchery device. After birth, the bodies of all chicks are not dry.
Normally it takes almost four hours to six hours to dry chicks. After passing that time, you should wait for more time to collect them.
Step Fourteen: Clean Eggshell
This is the final step of the total incubation process or the entire incubation period. After collecting all chicks, then you should remove all eggshells from that hatching device.
Then clean the total area of the incubator and dry it. Finally prepare for repeating this process, if you want to collect more chicks.
Types of Incubator
To start a poultry hatching business, you should know the variety of incubators. Here I am sharing the basic three types of hatching devices that you must know.
Type One: Forced Air Type Incubator
This type is the most popular and reliable now. It has a fan system that flows the hot air to all spaces of the incubator.
This is the reason why the heat temperature will stay the same in all areas. For this setting, all eggs get the same temperature at a time. For this reason, the number of spoiled eggs will decrease.
My suggested automatic hatching device is a forced air incubator that has an air passing facility.
This will be more good if you can use an automatic water pump for that hatching device.
However, there is no emergency to adjust the water pump to any hatchery device because it is expensive. You can do this work by spending little time with your hand.
Type Two: Still Air Type Incubator
There is no fan in this incubator. So there may be different temperatures in the breeding area. So the possibility of spoiling eggs may increase for different temperatures.
Additionally, you can add a fan to this hatching device. But it is a boring task to add an extra part to any hatchery device. It has also an internal temperature and humidity detection or display system for monitoring everything.
In this type of incubator, it is always important to monitor humidity levels in the area of the incubator.
Now you may have a question: What happens if the humidity level is too high than the required humidity level in this type of incubator?
At the stage of hatching, if humidity is higher than standard, the chicks will weaken. Because at that time, they can’t breathe properly. This is the reason why they can’t break out the eggshell.
So my suggestion is that by avoiding all these problems, you should collect the automatic hatching device smartly.
Type Three: Conventional Type Incubator
This is a traditional type of hatching device that is mostly used early. It has fewer facilities than the air force incubator.
The homemade hatching machine is one kind of conventional incubator. All parts are separated in this hatching machine. You need to collect parts separately and combine them together.
For example, you need to collect a sensor, hygrometer, temperature reader, box, fan, heat insulator material, and heating element from the marketplace for creating a conventional incubator. In past, hatchery farmers used this process for their poultry business
All Types of Eggs can be Hatched in the Same Incubator
This is true. You can hatch different types of bird eggs in an automatic incubator. But for doing this, you should know the rules. Don’t worry. Now I am telling you about these rules that you need to follow.
Rule One: Don’t put eggs of different species in a hatching machine at a time. Because eggs of different species need different temperatures to hatch.
You can’t set different temperatures in a single hatching machine. For example, the incubation temperature of the chicken egg is needed 38°C. On the other hand, goose eggs need 37.6°C
Rule Two: You can’t use the same incubation time for all eggs of different species. For example, The incubation time of the Egg of Pigeon is almost 18 days and the turkey is almost 28 days.
Rule Three: Use eggs of the same species in one hatching machine. I think now you have understood this matter. If you really want to hatch eggs of different species, then at first use eggs of the same species.
For example, when you start a chicken hatch, just use a chicken egg. Don’t use goose eggs or other eggs at the same time in that hatching machine.
Incubator for Goose Eggs
You can use it as a goose incubator too if you follow the rules about goose eggs. Such as you need to follow the selected temperature and other issues that are only made for the goose.
But don’t worry about that. If you follow the instructions, then you can easily use it for goose eggs.
Duck Egg Incubators
You can hatch duck eggs in this suggested hatching machine. The incubation days of this egg are almost 28 days. In the incubation period, the temperature is near 37.8°C and humidity is near 60% to 75%. In the hatching period, the temperature is near 37.3°C and humidity is near 65% to 85%.
Use this Incubator for Chickens Eggs
You can hatch chicken eggs in this suggested hatching machine as a chicken incubator. The incubation days of this egg are almost 28 days.
In the incubation period, the temperature is near 37.8°C and humidity is near 60% to 75%. In the hatching period, the temperature is near 37.3°C and humidity is near 65% to 85%.
Use this Incubator for Peacock Eggs
You can hatch peacock eggs in this incubator. The incubation days are almost 28 days. In the incubation period, the temperature is almost 37.8°C and humidity is almost 60% to 75%.
In the hatching period, you need to set the temperature (37.5°C) and humidity (65% to 85%) for this egg.
Use this Incubator for Turkey Eggs
You can also hatch turkey eggs by using this incubator. The incubation period of this egg is almost 28 days.
In the incubation period, the temperature is almost 37.7°C and humidity is almost 60% to 75%. In the hatching period, the temperature is almost 37.2°C and humidity is almost 65% to 85%.
Use this device as Pigeon Eggs Digital Incubator
You can hatch pigeon eggs by collecting this incubator. Here, the incubation day is 18 days.
In the incubation period, the temperature is around 38.5°C and humidity is 55% to 70%.
On the other hand, In the hatching period, the temperature is around 37.8°C and humidity is 65% to 85%.
You can also use these as quail egg incubators but you should follow the guidelines.
Incubator for Best Hatching Rate
I think you should collect a hatching machine that has a higher hatch rate. You can find the best hatch rate from a quality type automatic hatching machine. Because this type of hatching machine includes, display setting of temperature and humidity.
Besides, you don’t need to open the lid of this incubator for replenishing water. There is a fan ventilation system in it and air movement is easily possible in it.
So considering all these situations, the percentage of hatch rate of automatic incubators is higher than other traditional incubators.
My Viewpoint on the Incubator
In this topic, I want to share the information about a hatching machine so that you can easily collect any type of reliable hatching machine.
I have also described the different types of hatching machines because you can easily distinguish between them. I have described the basic working procedure of a hatching machine.
I have also described how to use an automatic hatching machine in an easy way. If you read the total post, I think you have a basic idea about it.
You know that without having a basic idea, you don’t collect a reliable hatching machine quickly. So my suggestion is that at least you should read the basic points before collecting any incubator.
After successfully chick production, now you need the right feeder and drinker for them. So you should collect these tools for drinking and feeding those chicks spontaneously.
Finally, I want to tell you that if you have some more time, then you can read the questions with answers about this device.
Asked Questions About Incubator
Can Chickens Lay Eggs without Staying with the Rooster?
You must be surprised to know that hens lay eggs without roosters. But the problem is that you don’t produce a fertile egg without a rooster.
If you put any type of egg in a hatching machine, then it can’t hatch. Only hatching machines need fertile eggs for producing baby chicks.
What is the Best and Reliable Incubator to Buy?
If you have read the total post (especially factors before buying it), then I think you have already got your answer.
If you don’t read that topic, then read it now to get the answer to this question. In those factors, the main focus points are included and you should follow those points to collect a better incubator.